step 1. drawing
square 1

Select the first square that has an image (shapes) in it.
Work with one square at a time. I started with the top row.
Visually divide the square into quarters (red lines).
Mark the points where shapes cross the grid lines. Also mark all "key" points (blue marks). Think where to position these marks. Questions you should ask yourself:
- Is this mark close to the 1/2 of the square's width/height?
- Or is it closer to 1/3 or 1/4 of the square's width/height?
- etc.
It is exactly the same technique that you used in Lesson 1 drawings:


This is how I marked the key points on my grid.

Connect all key marks. Make sure the shapes match.
Copy everything you see.
Forget the big picture. Just copy all the shapes that you see (even the blurred ones).
Add outlines of all major shadows and areas of high value contrast.
Focus on one square at a time!!!
Do not shade. Use only light fine pencil lines.
tip:
To help you focus on just one square - you might want to cover surrounding squares with 4 sticky notes.


square 2

Add as many details as possible. No rush!
Once you are done with one square - move to the next one.
The steps are the same:
- key points
- copy shapes
- outline areas of high value contrast
- no shading
- adjust previous square if necessary

Complete this square and move on to the next.
next squares

Continue drawing the rest of the shapes.
Take your time - accuracy is very important here.
It is also a great practice of not only your drawing/shading skills, but your sense pf proportion!
finalizing the drawing

If you are using a drawing paper - you need to erase all grid lines at this point.
Straighten the lines where needed for more accuracy.
You might want to "lighten" the lines before the shading step.
Use a kneaded eraser and "tap" the drawing lightly to remove extra graphite
(you can also use a piece of soft part of bread (no crust) - rub lightly over the drawing - it will remove graphite and any dirt).
step 2. shading
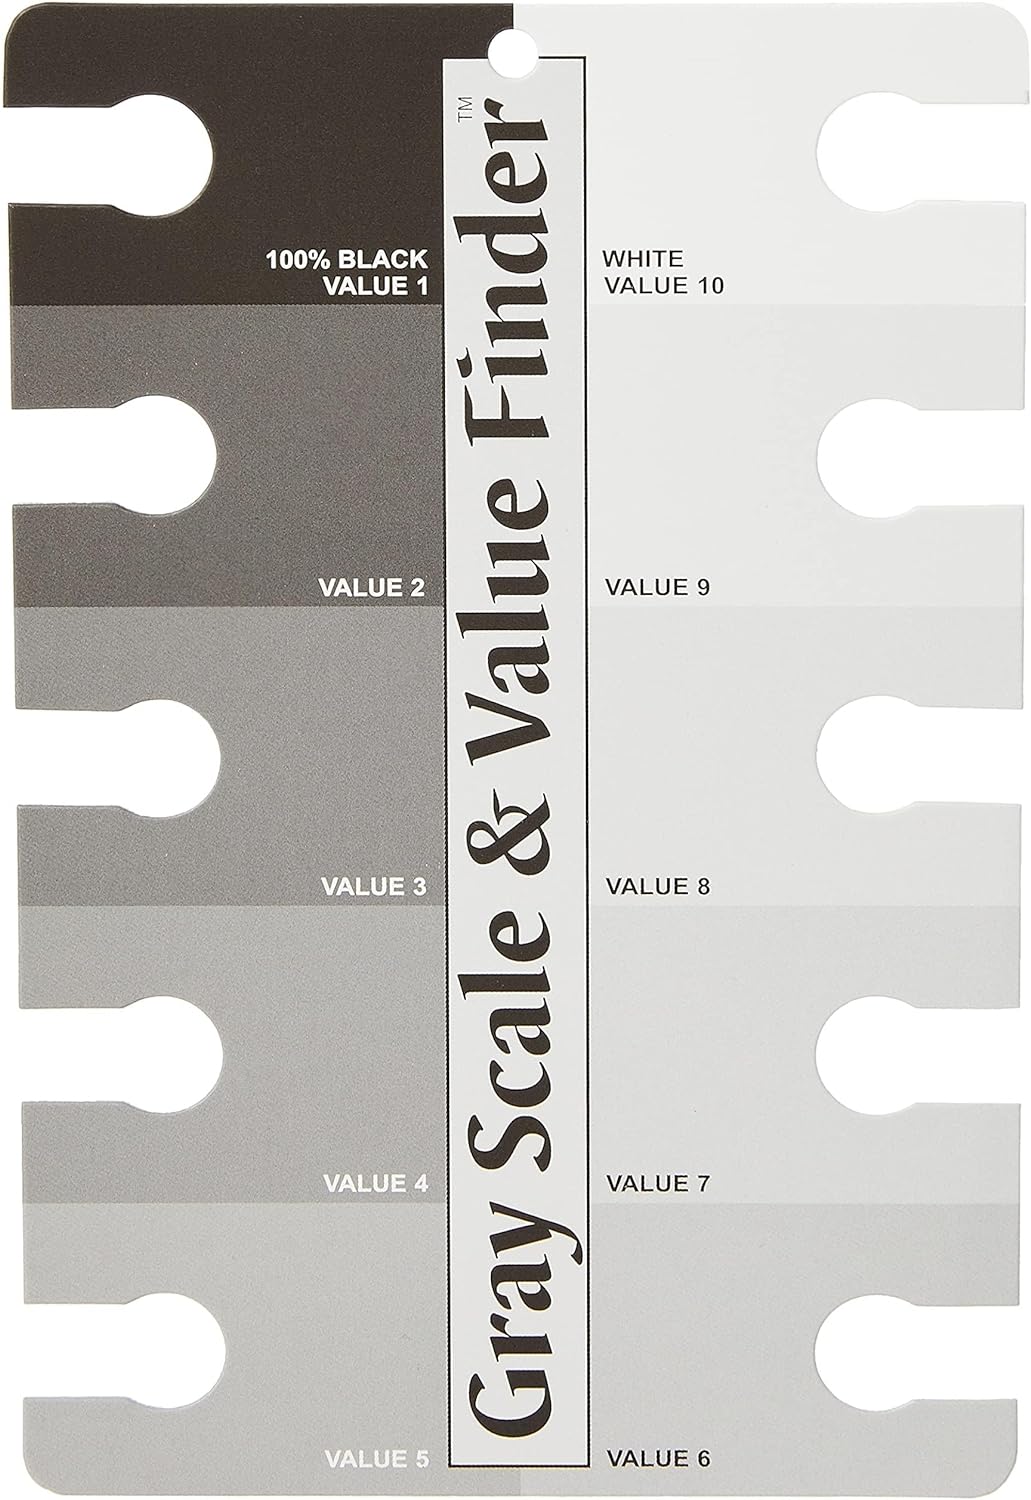
observe the values
Start with observing and comparing each shape's value.
Find the darkest and the lightest values. Is the darkest value BLACK? Is the lightest value WHITE?

Start with the area where you have a bigger variety of values or bigger value contrasts.

Value is always darker/lighter next to the contrasting one.
Look at the darkest side of the block - the value is darker next the top and front sides and the corner - the areas of the biggest contrast.
tip:
Do NOT outline your shapes with dark lines!
Outlining makes everything look flat and "cartoonish". Look around! There are not a single item around you that has an outline! You can see all objects against some kind of background (negative space).
Adding some shading of the negative space makes your drawing more realistic:
Look how wrong the outline looks:
If you have an object that has an outline, turn the outline into shading.
Start shading from the object and then "away" to make the outline a part of shading strokes: